Pages

Sunday, November 30, 2014

Just In Time For December!

 We got started with Christmas decorations early this year- I swear I was ready as soon as Halloween was over!  It's taken a couple weeks of working here and there, but I'm just about done.  Anyway, this post isn't a full tour, but I wanted to show you the new advent calendar I made this morning.
 
 I've seen trees like this around the web, and knew I had to make one for myself when I found the rustic wood strips at Hobby Lobby (like I used for this frame). 
 
I raided my stash of vintage ornaments and found ones that were a good size.
 
  There are twenty-five nails, one for each day of December.
 
 Here you can see that it still looks pretty even when it isn't full of ornaments.
 
 I put these wire baskets out to hold the ornaments until they are hung.
 
 And here it is with no ornaments- still just as pretty!
 
Now it's ready to begin the month tomorrow!  I think I'll let the kids take turns picking out which ornament to hang- I wonder which one they'll choose first?
 

Tuesday, November 11, 2014

Cutest Doll Furniture Ever???

A couple months ago, I won this amazing doll furniture on Ebay.  It is seriously SO ADORABLE- I can't get enough of it!!  And I got it for a steal, because the listing photos were really terrible.  But I've got an eagle-eye when I'm scrolling through Ebay, and I was able to see past those terrible photos- ha ha! 
 
It's actually larger than typical dollhouse furniture- I'd say it's more of a Ginny doll scale.  Since I've got almost an entire house worth of furniture, it's too bad I don't have a larger scale dollhouse to furnish!

My absolute favorite room is the bedroom.  I mean, don't you just want to gobble it up, it's so cute???
 
And there are no shortage of decals on these pieces- whichever Grandpa or Daddy made these is a man after my own heart!
 
Next there is the dining room.  This set had some broken pieces, but I was able to glue them back together, almost as good as new!
 
I mean, look at that measuring cup and mixing bowl on the table- I've never seen doll-sized decals like that!!
 
Last is the living room.  A couple of these pieces were broken as well, but as you can see, they're all patched up now!  And how cute is that little side table?
 
I love that whomever made these even put decals on the backs of the chairs, so you can see the cuteness from all angles!
 
The crime in all of this is that I really don't have space to display a lot of the pieces right now, especially not as a group.  So I've place separate pieces in various spots until I can come up with a better solution.
 
The bed holds a rusty metal orb...
 
And the dresser and vanity are up on the mantle.
 
These are my two favorite pieces, so I wanted to be able to see them all the time!!
 
I'll be sure to let you all know once I come across some wonderful large scale vintage dollhouse, so that all these pieces can live together again!
 

Tuesday, November 04, 2014

Framed Portraits

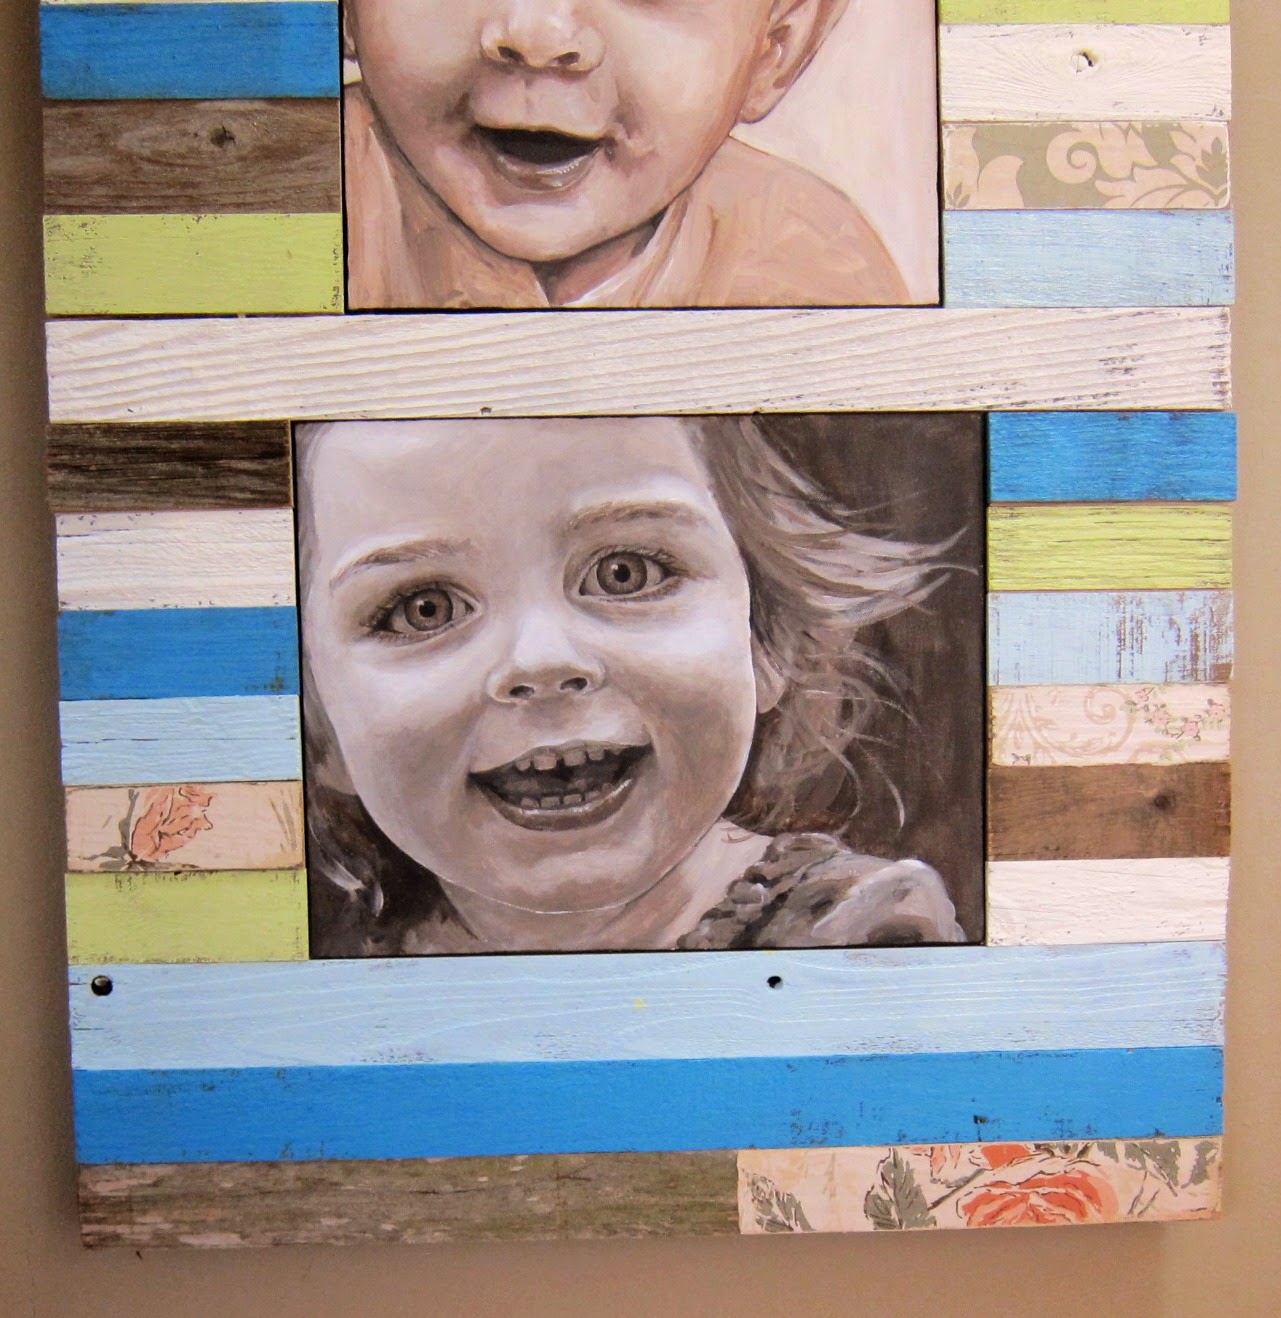
 You may remember these portraits I did a few years ago of the kids (aww, look how little they were then!).  I've always just hung them unframed, but I got the idea in my head recently that they needed to be framed in one big rustic wood frame . 
 
I could picture it perfectly in my mind.  Unfortunately, I didn't have any small strips of rustic wood or a willing husband to cut down a bunch of large pieces.  So the project sat on the back burner for a few months.
 
Until I went to Hobby Lobby last week and saw pre-packaged strips of rustic wood!!!  Exactly what I needed!  So I bought a bunch of packages, went to work, and a couple days later, I had this frame!
 
  It fits perfectly on this narrow wall in our hallway.
 
Plus, I can also see it from our kitchen/great room.  You can find me standing here at various times of the day, admiring it!
 
 I didn't do any kind of tutorial, but it's pretty self-explanatory.
 
 I just painted the strips of wood, allowing some of the wood to show through in places, then I cut the strips down to size.
 
Noah's portrait has a little more of an orange tone, and I felt it needed something to tie that "orange" into the rest of the piece.
 
 So I added these strips of vintage wallpaper that had a similar color.
 
 The strips are glued together, but I also added some long pieces on the back to make everything more stable.
 
 I like how those extra pieces on the back of the piece make it float out from the wall a little bit as well.
 
I'm in love with the finished product!!  And I'm in love with the strips of wood from Hobby Lobby- I have a bunch more future projects in mind for them!  When I asked whether these were something they'd be carrying in the future, nobody seemed to know, so I bought all they had at my store!